upcoming review: BAE RBAV-AF

Monday, August 13, 2012

Comprehensive Tips: The Combat Side Stroke

There are exactly four hundred million billion and eight videos on YouTube from NSW/NSO Mentors and/or former SOs that go over the basic steps of the CSS, so I will not be boring you or myself with taking a bunch of pictures of myself in the pool. I expect you know the CSS, or can find these basic tutorials fairly easily if need be. This article is intended to be a compilation of essential tips that may help the CSS just "click" for you. Good luck, keep it light.

1. Level out. Kicking your legs down into the water and kicking your body up out of the water is obviously inefficient. As tempting as it is to new or weak swimmers to tilt upwards so as to get more of the head out of the water and get closer to that lovely, lovely air, keep your body underwater and as parallel with the surface while remaining subsurface as possible. This will not only aid in increasing the stroke's efficiency, but it will also ingrain one of the essential tenets of the CSS into your muscle memory, that being signature reduction. A proper CSS will maintain a very low visual and audible profile. No white water, silent killers, etc.

2. Rotation, rotation, rotation. After college, I worked for a year in a grocery store. They always told me "Rotation, rotation, rotation" when referring to perishable products. Little did they know how useful this lesson would be. As you bring your first arm stroke down to your side, ROTATE your shoulders with it. You ought to end up at least on your SIDE, if not more on your back. One way to ingrain this motion into your stroke is to literally rotate all the way onto your back, survival float style, after each side stroke. Return to normal start position, almost face down, whenever you like. If you cant tell if youre doing it right, your NSW/NSO Mentor will be able to. If you have yet to make contact with one, get a buddy at the pool, explain to them what youre supposed to be doing, show them some videos maybe and have them observe your stroke. If you can conceive an axis along which you are traveling through the water, you ought to be rotating about this axis- just like long distance freestyle.

3. Lift your chin, not your head to the air. Follow your shoulder with your chin to learn to do this. As with other strokes, periodically lift your head up and check your direction to ensure you arent going to hit anyone/thing.

4. Breathe. This cannot be said enough and requires much more practice than most think. Breathing when swimming is not as easy and therefore not the same as breathing when running. If you are having trouble maintaining a sustainable breathing pattern when swimming, Swimmers Pullups are the first step in building breathing ability and timing. These do not focus on lung capacity, which is something else entirely. Make sure you have a good pool edge to practice on, something you would feel confident grabbing to exit the pool. Grab the edge and go under till your arms hit full extension. Pull yourself up out of the water until your arms hit full extension. Breathe in when you can and out when subsurface each time. Starting goal: sets of 20-30, no time limit just as fast as you can. Do with your Flutter Kicks, 10 Counts, etc. Dont hit your chin on the edge of the pool.

5. The current PST is a moderate swim in terms of length, but still, every little bit counts. Be sure to ingrain efficient movement only into your stroke and exclude any wasted movement. That means: Bring the hands close to the body when extending them forward. If you flutter kick, fine, thats your call. If you do not, do not allow the legs to move side to side while stroking with the arms. Do not go deeper than you have to in order to stay subsurface when kicking off the walls. Obviously, there is no reason to travel down and then up when all we need to do is go side to side. The kickoffs are your greatest opportunity in the PST, kick hard, use an efficient profile to get through the water, ride the kickoff out all the way. A far as making your second stroke efficient is concerned, you do not need to keep your arm fully extended during the stroke. It may curl inward towards your torso as you pull it down. Again, no need to pull you up out of the water, were just going sideways.

6. I had the same problem when I got into BJJ, everyone I saw getting into it did. Keep. It. Light. The PST is a series of tests, not just a swim. Naturally it is pointless to crank out an 8:30 500m CSS if you then get out and can only muster 40 pushups in 2:00. It is highly unlikely that you will get picked up or be allowed to continue training without retesting. So, keep it light. It may help to consider that you ought to be gliding, not fighting through the water. Keeping your exertion levels low will also allow you a little more room for error with your breathing.


Friday, April 6, 2012

Polishing Glock Safety Plungers

It aint perfectly mirror polished, but I did reprofile and polish my edc 19's safety plunger just for the hell of it. I also polished the trigger bar contact area using the same processes and achieving similar results in terms of finish. I did not reprofile the trigger bar contact at all.  The only bad things that could come of this modification are: messing up the profile and inducing some corrosion issues through messing with the finish. I dont make mistkes so I didnt have to worry about the profile and I highly doubt that it would be able to oxidize past a superficial point in my lifetime. Even if it did, presuming shit has not hit the fan and I can still order one from LWD, a couple bucks and a couple days gets me a brand new one. Problem solved.

Anyways. This does noticeably smooth the takeup, even for absolute trigger philistines. If you regularly let out past reset, this may come into play with your follow up shots, but for most it will probably only matter when acquiring the trigger's wall directly after the draw. Consider whether this amount of work is really worth this marginal, truly insignificant payoff. That said, this is coming from someone who never understood the allure of a glass rod 1911 trigger as opposed to a Glock's spongebrick trigger for defensive purposes. So. Take it with a grain of salt. It is an improvement in the takeup, the takeup just aint that important to me.

If you are considering doing this, REMOVE THE PLUNGER'S SPRING. This ought to be common sense. If you go at the thing with a Dremel and any steel brush tip to start with, it will send the spring flying as soon as it touches it and it will take forever to find. Depending on where you are, you may never find it. So, set it aside with your other small parts as you usually do in a baggie or box or whatever. Just keep track of it. Also, even if you are using a sanding tip for the initial reprofile and not a grinding wheel, you can seriously fuck up the plunger if you do not take it SLOW and GENTLE. Remember to keep the plunger's head the same height, you are ONLY reprofiling the edge, that is ALL. If you attempt to polish the tip of the plunger and in doing so shorten it, it may not allow the striker to clear it when the trigger is pulled and in short: yo gun aint gonna work.

Tuesday, April 3, 2012

A unique holster project..

Couple months back I started work on a prototype holster, pictured below. To my knowledge it is the first Kydex inside-the-thigh holster. Many changes and improvements will be made based on lessons learned with this model. For example, Im deleting the mess of elastic straps supporting it and connecting them at slots in the holster body for a clean, uncluttered appearance and less of a chance of interference with reholstering.


Specs: 0.060" Kydex, Pancake design, bolted together with 3/16" blued hardware. 1" Velcro closure elastic strap fed through integrated slots in the holster keep it against the thigh and connect it to a Duro Ind Lambda NTS half-corset above the hips. The corset is split-front and tied with 5mm accessory cord, all seams Frenched and the eyelets reinforced with a 1" strip of Twill since the Lambda NTS is not strong or thick enough to support rivets. The 1" elastic is canted slightly and box stitched to the corset with Size 69 black bonded nylon thread. The MC Lambda NTS fabric shows through lightweight fabrics, white in particular. I will make the next, improved one with white or grey Lycra or a similar UnderArmor fabric to eliminate this issue. Multiple corsets may be necessary for multiple covering garments.This design eliminates the possibility of eventually wearing through thin underwear or garter belts by using metal clips and provides a better anchor for a heavy gun and holster than a garter belt. The bolt pattern fits Kydex IWB wings Ive made as well. The rigid holster provides a more consistent platform than any soft leather and more importantly it cannot bend inward when reholstering, causing an AD. This one is for a Walther PPS in 9mm. 6 and 7 round mags do not print with medium-weight fabrics. Currently working with a couple gals on T&E and perfecting the design. May take custom orders for it some day.

As of now, due to a need for a better name than "The Kydex Inside-The-Thigh Holster," Im calling it the Athena Holster.

Saturday, March 24, 2012

Boogie Time

How to turn Wiley X CQC lenses into unventilated Smith Optics Elite Boogie goggles. No regulators on em, naturally. Working on that. You could always just drill a bunch of holes along the top edge like Smith did. Thatd help somewhat. These have no padding, very uncomfy of course. Neoprene from cheap 5.11 kneepads or pirated components from the cheap sunglasses at your local convenience store would work brilliantly. All you need is a lens, padding, a drill and some shock cord. These are mounted using Ops-Core goggle mounts to maintain QD ability, but tying the shock cord directly to the ARC rail would work fine. Smith's far more professional version should be around $40, (plus ARC mount, probably), so this isnt a solution to a problem of expense. Just temporarily one of the best ways to cut down on a lens frame obscuring FOV. Keeping your peripheries open is paramount to maintaining situational awareness. Nothing does it better than a Boogie google.


Ill get the RBAV review up.... Sometime....

Sunday, January 8, 2012

BCM Gunfighter

AR charging handles went through a number of changes to account for changes in technique over the years, yada yada yada, as a result we ended up with extended release latches and forces on charging handles that the unit simply wasn't designed for. Eric over at VLTOR designed the product marketed as the "BCM Gunfighter" series of drop-in charging handles that have gained much respect, repute and admiration over the last year or so. In my year or so with it, I found a few innocuous issues that could be addressed in the pursuit of truly perfecting the component for practical use.


In case you weren't aware, its a 7075 T6 handle and release latch. I switched my primary to a new upper round 8 months ago and haven't noticed any excessive wear on the release latch's notch. The handle and release latch are hard coat anodized per Mil-A-8625F, Type III, Class 2 and I expect the spring is stainless. The handle features an ass unlike "standard" CHs that allows the release latch the contact the handle at its ass and tranfer force into it. This transfers much of the rearward force of single-handed manipulations into the handle body instead of weighing it all on a single roll pin as in "standard" designs. I had to machine out a replacement pin for a sheared roll pin just today... Not on a CH or anywhere near one, but nonetheless... The Gunfighter's system does seem more durable.

Laser engravings are on the top of the handle. VLTOR, BCM GUNFIGHTER, caliber and the stars and stripes:


Wear marks can be expected to go right through the anodization as with traditional CHs. Which side and where, exactly, the marks appear will depend on which hand is dominant and how, exactly, they manipulate their CH.


On the THE ISSUES. As previously stated, they are inconsequential and do NOT prevent the operator from making effective use of the weapon. For this reason, the gunfighter remains a significant improvement over traditional CHs and my preference for a practical use CH. That said, improvements that would not alter performance negatively could be made. They are as follows: My support hand index finger, as well as the support hand index fingers of many an end user, have been cut superficially though distractingly by the unfinished edge of the release latch, indicated below.


Beveling this edge would not increase production costs significantly and not decrease the structural integrity of the latch significantly while significantly increasing ease of use for non-gloved hands. I do love shooting a carbine with gloves, I find I fear the controls less and tend to manipulate the weapon more aggressively and ultimately more effectively, although I tend not to wear gloves when shooting: A) because I suck at handgun with gloves, and B) because I may be shooting at something coming into my house in the middle of the night and to loosely quote Bernie Mac from Ocean's Eleven, I don't wear gloves to bed since I find that it interferes with my personal agenda.


My only other issue with the product is theoretical and has absolutely no basis in my empirical experience with it. I decided to state that before stating the theoretical issue. If you'd like to completely ignore this commentary based on that, I'd completely understand. If you'd like to read on out of curiosity nonetheless, I'd understand as well.


Tolerances between the release latch and the handle are rather loose and have loosened up slightly with use. The release latch does NOT move anywhere near perfectly about the axis created by its roll pin. As demonstrated below, after about 1000 rounds of primarily support-hand use, my release latch can move so far downward before moving backward as to contact the CH before releasing the CH. ...Locking it in place and stopping the rearward motion entirely. THIS HAS NEVER HAPPENED TO ME WHILE ACTUALLY USING THE PRODUCT AND I MUST INTENTIONALLY INDUCE IT. I trust the product to function effectively under all conditions, though tighter tolerance would certainly offer me more confidence. That's just me, bro.


The usual (this endplate has since been staked):

Thursday, November 24, 2011

EssTac Shotgun Cards

I doubt I have any regular viewers, if you will, but if I do: sorry for the hiatus. I... Just got bored. Deal with it.

Some blahblahblah about side saddles, if you aren't familiar:

There are a couple options out there for long guns. Naturally the carbine is the best. If you should be forced into utilizing a shotgun in a defensive scenario, whether by departmental constraints, stupidity, the hand of god- whatever, it will probably feature a tubular magazine. Tube-feeders have very low mag capacities and thus shotgun side saddles were ushered in to provide shotgun operators with as many rounds on the weapon as possible. Finally, within the world of shotgun side saddles, there are a couple options. Over the past decade or so, Mesa Tactical's aluminum offerings have more or less dominated the respectable market with Tac Star's chasing behind shouting "I sell better and work just fine, really!" More recently, a return to "tactical nylon" has come about in the world of side saddles and EssTac's Shotgun Card is a fine example. The primary reasons for using an elastic retention system over the plastic of a Tac Star or the aluminum and Santoprene or whatever of a Mesa saddle are as follows: The shotgun is a violent weapon system. It throws everything on it around quite a bit. If you can find a side saddle that is rigid in construction AND retains shells perfectly under heavy and extended periods of recoil AND allows them to be easily removed when needed, I'll eat my MSM hat, the one with the earpro in it. In addition to that, there have been periodical reports on various internet forums of mounting hardware for heavier saddles such as Mesa's shearing under recoil. If you would like to only base your product selection on empirical knowledge, more power to you and go ahead and buy Mesa. Otherwise, read on.

EssTac's Shotgun Card is a simple 2"x~7.4" piece of rigid webbing with a 1.5" wide elastic strap sewn along it, double stitched at regular intervals, (0.9"-1"), to allow it to accept and retain 7 of any length 12 gauge shell. This is not a new concept, but it is certainly a cheaply executed iteration of the concept with definite bonuses over alternative side saddle options. I wont try to sit here and justify what I bought to both you and me. No system is perfect and it certainly has its downsides. Jus sayin. It's got its ups, too.


The card ships with a small loop of cordage at one end. This cordage features a 7-strand core and is double stitched through both the elastic and rigid 2" webbing base. It is easily cut by the end user. As with any paracord, just take a lighter to it and pinch it to finish it off nicely. I ditched mine because A. I dont need any sort of pull to extract the card from a pouch or to remove it from a weapon or loop platform, I can just grab the goddamned card itself, and B. loops of anything are snag hazards, and snag hazards that are attached to firearms are just liabilities. The cord can also get stuck on the card's hook backing and disrupt its ability to secure itself to a weapon. Other manufacturers have begun offering cards with simple, no-frills extra bits of material at the ends, not loops, to ease drawing the card from a pocket and removing it from a weapon. Again, I ask why. But. Whatever. As I will explain later, another nice thing about cheap nylon gear as opposed to expensive aluminum components is that you can modify just about anything about it easily and without feeling like you're wasting money/destroying something valuable.


The read of the card is entirely covered with hook material. Die-cut loop backers are available through a couple reatilers and do NOT ship with the cards themselves. Alternatively, adhesive-backed loop strips from 3M work just fine, and like other die-cut offerings, can be cut to any size, shape, form, whathaveyou to accomodate various receivers and various needs. For example, if this is a department gun and no permanent modifications may be made to it and the serial must be visible for inventory purposes, just cut the backer so the serials visible and when you're through with the side saddle altogether, a simple wash gets any adhesive still on the receiver off and shes good to go in a few minutes with no tools.


I have had no issues with the card falling off or coming partially off the gun. The hook material can also be cut out at on corner to ease removal from the weapon if the quick change capabilities of this system are really that important to you.


Feeding the elastic loops is certainly harder than loading a rigid carrier. If one were to reason it out, they'd find that increased speed and ease of use is always appreciated... hooowever loading a side saddle is not something you do when you need rounds on target, so the marginal increase in loading time becomes something near a non-issue. It really is not that difficult and you'll become quite adept with it. Retention issues with recoil and EssTac's shotgun cards are not unheard of, although as usual EssTac customer service is beyond awesome and if they stitched the elastic a little too loose, just call them up and let them know and they will replace it for you.

I was reticent to go the elastic route. I've used Mesas and I very much like them. Most of all I like that, (so long as their mounting hardware holds up), they will still be functioning probably long after I die, depending on how much use they get. The elastic of the EssTac Shotgun Card does not offer such longevity. Unfortunate, but nothing's perfect. Luckily they're cheap to replace, bout $15, and will probably last the average shooter a couple of months at least. I can see them being worn out much quicker if the shooter often lays the weapon down on its left side. Elastic like this also lets you know when its time to replace it. You'll notice pitting and you'll start to see the rubber strands inside it in time to order a replacement, especially if you order from SKD.


I have noticed that the rough edge of the card can cut my thumb at its first knuckle when I bring my strong hand up into a higher grip to access the slide release on Mossbergs. Like the safety edge biting into your thumb, or cutting up your fingers ramming rounds into the tube, it would not even be noticed under stress and is not a serious issue. That said, I expect Stu over at EssTac could pretty easily figure out how to slip some 5038 tape over the edges and clear this up.


Regardless of what type of monte carlo stock you're running, nylon side saddles can easily be adapted for use on the stock as well. Even if you've gone with a 12" LOP and the card is longer than the stock body, a Dremel with a cutoff wheel and a lighter will make short work of taking off a round or two from a carrier such as this. Of course, be sure to cut on the right side of the elastic's stitching...

 
I've probably forgotten something about this product. Oh well. That's all I can muster at this hour.

If you have any questions or comments regarding this or other equipment, feel free to ask away. I'll respond to the best of my ability. Cheers.

Thursday, June 30, 2011

OTTE Gear DK Jacket

Before getting into the DK, I'd like to say a few words about "tactical" jackets so that I might convince any viewers who would turn to customers to save their money and get a normal damned jacket.

I have heard only good things about such "tactical" shells and jackets from TAD, OTTE, SORD, etc., but I have also come to realize that many outdoorsy companies present similar offerings without the $200+ increase in price for a bit of Velcro on your shoulders. Yes, these companies use exclusively fantastic fabrics that can withstand the fury of ten thousand suns and yes, cheaper jackets will repel water and refuse to fray just as well without looking conspicuous. As I will explain later, some shells from Mountain Hard Wear, The North Face and the like even offer better features in terms of pockets, their layout and the general fit of the garment.

And for fucks sake. I once saw a guy in an airport wearing a TAD jacket with morale patches all over his shoulders. For fucks sake dont be that idiot. Be prepared, but not overtly so.


OTTE is, I have found, fairly unknown even among the tactical community. I once sat next to another guy on a plane who sported a TAD jacket and a Mystery Ranch bag but he said he'd never heard of OTTE. I wouldn't worry, though. Given the quality of their products, I doubt that they're a bunch of startup guys in a shed in New York. The DK I have and one a friend got when OTTE had a sale a couple months back are nothing short of amazing. It is designed to be a highly lightweight, water-repelling shell ONLY. There is absolutely NO insulation of any sort. If you plan to use it year-round, plan to buy extra layers. I took the DK skiing about 5 months ago at Wolf Creek in Colorado. This was not the coldest weather I have experienced while wearing the DK, but it certainly got plenty of snow and water on it during that trip.


With only cotton base layers, I was fine. Apart from some snow up the back of my shirt from some nasty wipeouts, the DK refused to allow me to get wet. (I did not ski with patches). On other occasions I've taken the DK out (with plenty of layers) in sub-zero conditions and had no issues with anything freezing up. Except my nose hair.

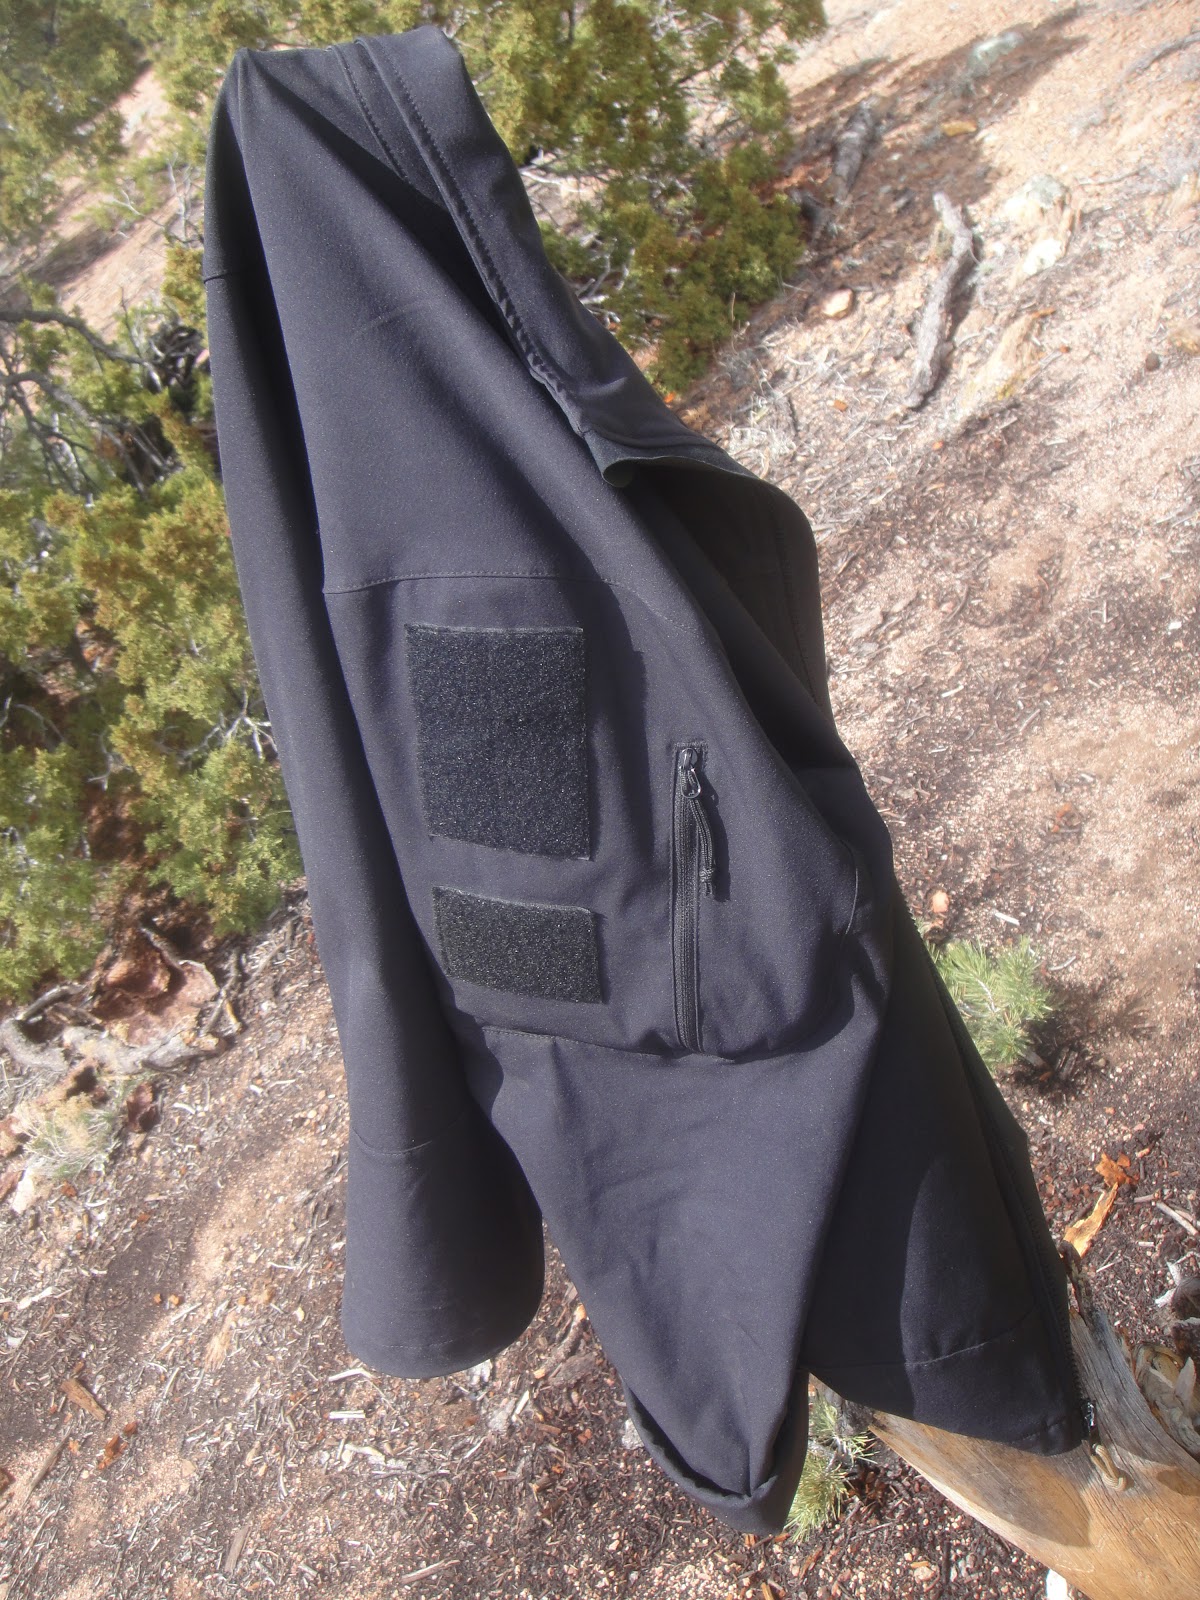
The collar is high enough when popped to keep shoulder straps, slings and brass off your neck. I wouldnt worry about abrasion with a sling, either. It might wear the DWR coating faster, but the Durastretch Tweave fabric used throughout the jacket's shell has held up nicely. I've negotiated countless concrete and steel edges when rappelling in this thing and despite just sliding over some of them on my belly, no evidence of wear can be found on the jacket today.


Speaking of the coating, the Schoeller NanoSphere coating has worn faster than any other DWR-coated fabric I have ever owned. Out of the box, you could do the traditional hold-it-under-a-sink-and-then-shit-yourself-when-its-totally-dry test. But after about two months (without washing it once) water stopped even beading on the surface. After a wash it did not improve noticeably.


There are two large internal pockets. Open tops on each of them, no closure method of any type. This lack of closure does not bother me... The fact that they left a portion of the side of the pocket at the very bottom of the pocket wide open bothers me quite a lot. If you have some explanation for the lack of complete stitching on these pockets, please go ahead and explain away in a comment. Otherwise, I will continue to be annoyed at the internal pockets' inability to securely retain anything smaller than say a water bottle. Surefires, phones, pens, knives, they all fall out. Sometimes you dont notice and its an expensive loss. Sometimes you need what was dropped and it was a very expensive loss.


The interior pocket fabric is also very thin, with patterned perforations. It is nowhere near waterproof so I highly doubt that the holes in the pockets are there for drainage.

There are 20" pit zips but I almost never use them. OTTE included an elastic strap inside each sleeve with some Velcro on it for use as a sleeve keeper. I also never use that. Ever.


Shock cord and GTSP-style locks are used to adjust the fit at the waist, or just below. When carrying a P220 OWB I once had the end of the right adjuster catch on the base of the holster (Galco) and stop my draw dead in its tracks. I was able to repeat the problem. While this is probably unlikely to occur, I imagine that OTTE could easily move the adjusters to the very front or rear of the jacket's base and eliminate the possibility of this issue ever recurring.


The DK packs down to become pretty compact. The fabric is pretty scratchy, theres a fair bit of Nylon in there. Not the most comfortable of pillows but better than a backpack. Remember to keep your jacket in mind when searching for a soft shooting platform for precision rifles. I find they make better rests than a bulky and sometimes bumpy backpack stuffed with crap.


The two exterior pockets are secured with small YKK zips and some thin cordage pulls. No complaints here. The zipper does not reach the base of the pocket, so even if you forget to close it, important stuff like phones, wallets, etc., are retained fairly well.

The main zipper is also YKK. It does NOT ship with a pull attached, I used 550. Beneath the zipper, running the length of the zipper, is a rubber strip with suede-esque backing. Water-resistance, I suppose.


Wrist size is adjustable via hook and loop. Not exactly secure. Regularly comes undone and must be reattached. Sleeves are large enough to fit over large glove gauntlets. Sleeves will roll up and stay that way as long as you want them to.


Note that this is a water-resistant shell, not a water-proof one. Heavy rain will and has soaked mine through, though even when soaked the fabric remains stretchy enough to fit a handle of Jack in one of the interior pockets. I think this is a decent demonstration of the pocket's capacity. You can carry quite a bit of shit in there.


The DK has a rather smock-like fit to it. I ordered a Medium and received what appeared to be an extra large, but it was indeed marked with "M." It is very loose and has absolutely no inherent form to it. This translates into a natural range of motion for the wearer and very easy concealing of a handgun. Not my first choice, again, for an inconspicuous covering garment, but effective. Not many people will notice the Velcro in public so its not like wearing daisy dukes and a tube top, but be sure to at least avoid Multicam if you plan on sporting the DK in public.


The bicep pockets are massive and will fit a very respectable booboo kit. Flat supplies such as gauze pads, bandaids and alcohol pads fit very easily. Combat Gauze and tape fit easily and print a little more. TKs, 4" IBDs, massive packages of rolled gauze and even some abdominal dressings fit. If you dont like the idea of extra med supplies on your arms, these pockets are always a good place to stuff gloves, small earpro, pens, cameras, phones, etc. when wearing load-bearing equipment and not given space for an admin pouch for that stuff.

A small loop is provided. I find that this is rarely appreciated in the wilderness, where one can simply throw their jacket over any branch, but absolutely lovely in a public restroom when you need to shit but dont want to unnecessarily dirty up your $250 jacket.


The stitching on the Velcro has yet to weaken noticeably. Corners are all still held in tight.


I have put only one hole in it thus far, and I'd like to keep it that way. Screwed up a landing on my mountain bike and ended up eating some asphalt. The hole pictured below, compared to a penny, was the only mark on the jacket. Just below the elbow. Elbow was still bruised, but the jacket saved it from an annoying scuff.


All in all a decent shell. Could use a few small improvements in my opinion, but overall I'm certainly happy with it.


If you have any questions or comments regarding this or other equipment, feel free to ask away. I'll respond to the best of my ability. Cheers.

Monday, April 11, 2011

Cobra Buckle Tests

If they needed any additional credit to their name, I packed a couple Cobras I've got with rocky sand and dirt in an attempt to induce malfunctions. As with any mechanism, the action after packing it with debris was not as smooth as when it was clean, but both buckles, (an FC25B and an FC45SA-XL), remained in working order. Both still locked and unlocked fairly easily, sometimes requiring a slight tug to unlock fully. After locking and unlocking them a couple times, they freed up. This minor test was about a week ago and neither buckle has been cleaned yet. Neither shows ostensible signs of ever being mucked up and I feel that the FC25B is still professional-looking enough for daily wear on my belt.


Thursday, March 31, 2011

Zero Tolerance 0400ST

I've owned this 0400ST for about two years now and honestly if I had to chose one knife to carry for the rest of my life, this would definitely be up there. If I had to chose one folder to carry through the Zombie Apocalypse, again, this would definitely be in the running. The 0400 is simply a damned solid knife.


The basics:

- Blade length: 3.875"
- OAL (Open): 8.5"
- OAL (Closed): 5"
- Locking system: Liner
- Blade material: S30-V SS
- Blade coating: Tungsten DLC
- Handle material: "Aircraft-grade aluminum" (probably anodized 6061) with "Trac-Tec" rubberized inserts
- Liner material: "Titanium"
- Weight: 5.1 oz. (a relatively heavy sucker)

It features the ZT Speed Safe assisted-opening system. I have had no issues with this system ever malfunctioning in any way, despite an extended period of testing and less than ideal operating conditions. I've had SOG assisted openers turn to manual openers on me. This knife and its assisted-opening system show no signs of ever giving out in any way.


The pocket clip is held in place by two small star screws (the same size as the screws that hold the two aluminum plates that constitute the handles together) and it is reversible for tip up or down carry, but it can only be affixed to one side of the handle. The other side of the handle features the rubbery Trac-Tec grip inserts. Like everything else on the knife, they're solid as hell and have not budged since the day I opened it. The handles do feature a lanyard hole which easily fits paracord.


The modified tanto blade features an ambidextrous fixed thumb stud and an "index finger protrusion" should you choose to open it with your index finger instead of your thumb. I find this method preferable. The ST model's blade features some interesting "curtain" serrations. I find them impossible to sharpen, but I have had no need to do so. The also cut far easier than traditional serrations, just much smoother. They do not get caught on cordage or anything really. Love em. The blade geometry is interesting. I'm no engineer, so I can't say it's any stronger than a simple flat ground, but it's at least interesting to me. Here's a decent shot of one that showcases the blade geometry:


I went with the 0400 as opposed to an 0300 as most people would have simply because I wanted a metal-handled knife. As can be seen in the top image of this post, I've had to use this knife as a hammer a couple of times. I understand that this is by no means good for the knife as a whole or the soft aluminum handles, but I'm not really concerned with what's good for it. I am simply satisfied that, like 6Ps do and G2s don't, it works as a hammer when needed. I am sure that 0300s would work rather well in this respect as well, however I have no interest in splitting a polymer grip panel and ruining an otherwise usable knife. The handles are also very well deburred. Unlike some knives I've experimented with carrying, this knife's handles feature no sharp edges, corners, etc., to screw with your hands when you just want to reach in your pocket for a phone or whatever.


Pocketed:


I've found this steel to be particularly susceptible to cosmetic rust if left wet in an enclosed, humid area. A simple once-over with a bore brush would take care of the amount that I'm talking about, and if available some solvent would certainly help clean things up. This is perhaps the only negative thing I have to say about this knife. Of course, only the exposed steel will rust. I have noticed VERY few and very small wear spots on the blade coating, for the most part it has remained like-new. The anodization on the handles has taken a beating and shows many nicks and scratches. As can also be seen in the original photo, the tips of the handles have been mirror polished by about two years of tip-down carry in a pocket with a leatherman, keys, etc.


I've used the tip for prying more times than I can remember. The spine is nice and beefy near the tip and I've had no issues with chipping.

The blade's hinge is an adjustable larger star screw and nut. I left it alone. Straight from the factory mine opened plenty fast.


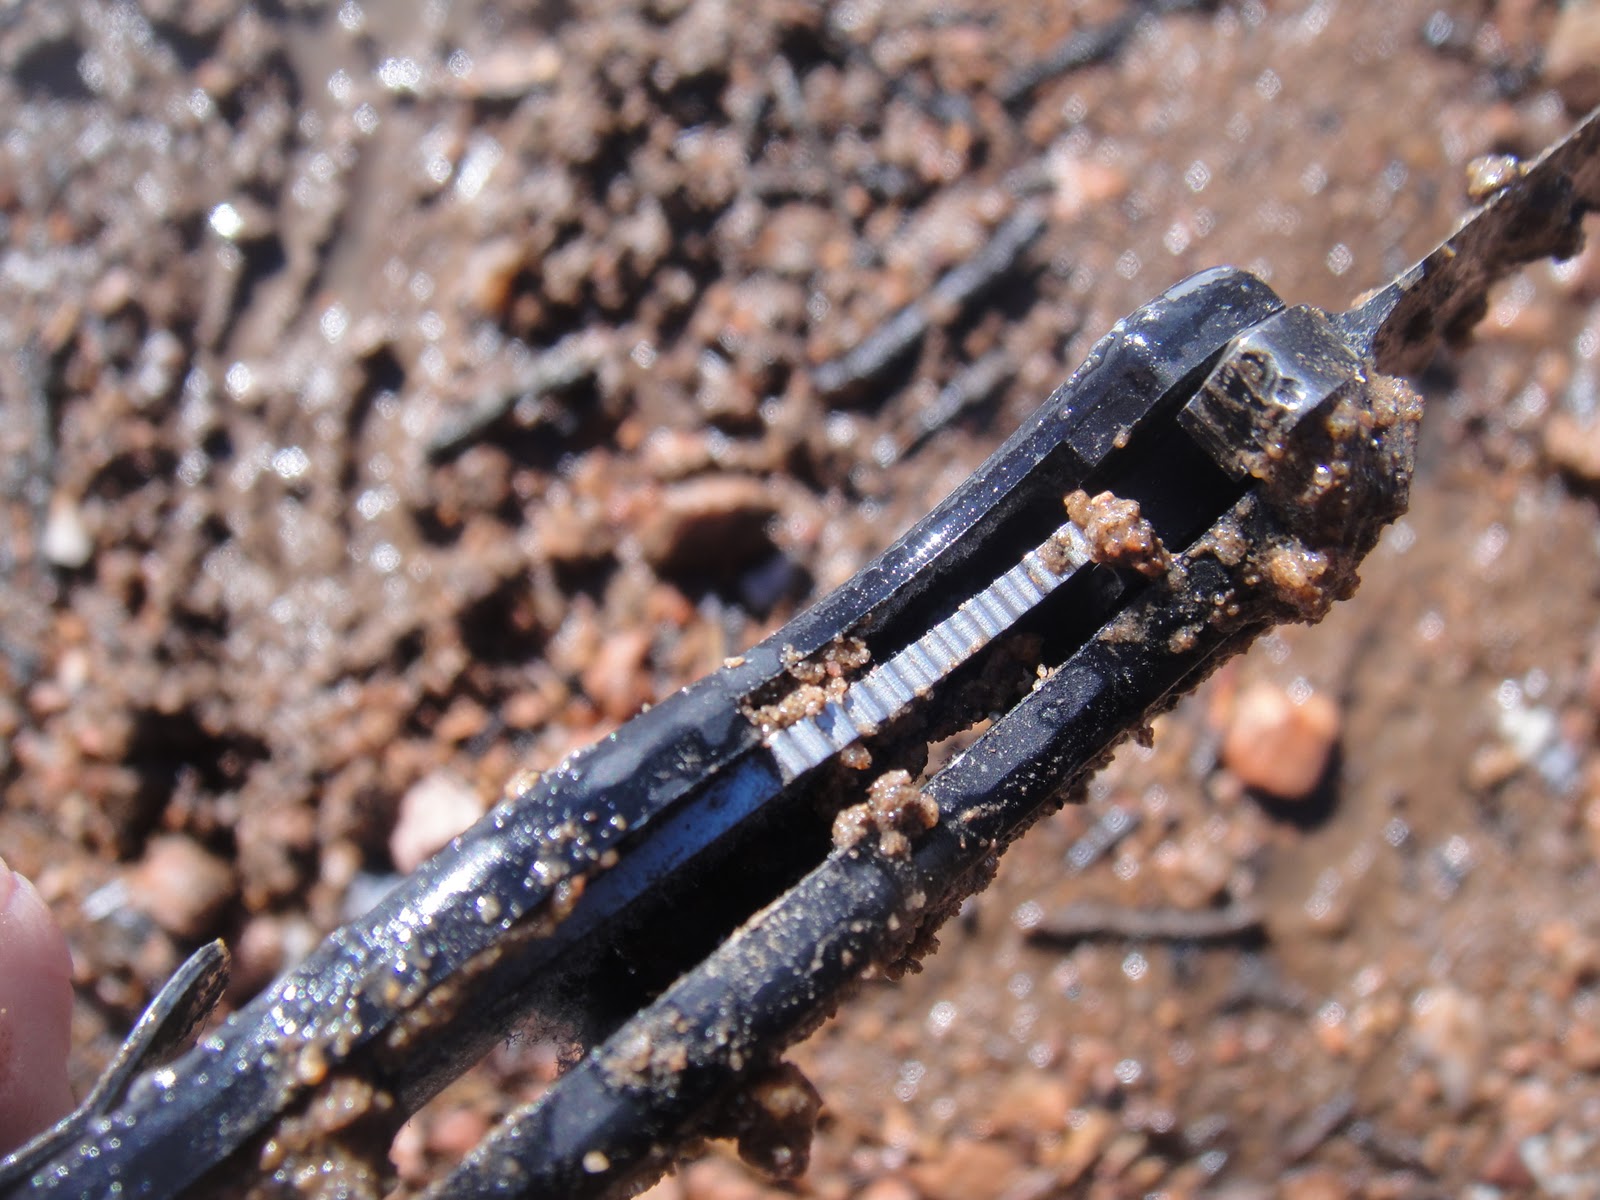
Like most liner lockers, you can jam enough crap between the liner and the handle to jam the blade open, but it's a simple matter of pulling out a backup knife to remove the obstruction in order to right things.


I've seen advertisements for it claiming that it has a "razor sharp edge." I've owned many knives and this is by no means sharp. Several Gerbers I've had have been significantly sharper. This is, of course, not altogether a bad thing. You may not be able to shave with it, but it will forever retain what little edge it does have.

Lockup is absolutely rock solid. I am not able to detect any movement of the blade in any direction when locked open.

Closed:


If you have any questions or comments regarding this or other equipment, feel free to ask away. I'll respond to the best of my ability. Cheers.